Your wildlife photography guide.
Explore the black oystercatcher in detail, study its behavior, prepare your shots.
Where to observe and photograph the black oystercatcher in the wild
Learn where and when to spot the black oystercatcher in the wild, how to identify the species based on distinctive features, and what natural environments it inhabits. The WildlifePhotographer app offers tailored photography tips that reflect the black oystercatcher’s behavior, helping you capture better wildlife images. Explore the full species profile for key information including description, habitat, active periods, and approach techniques.
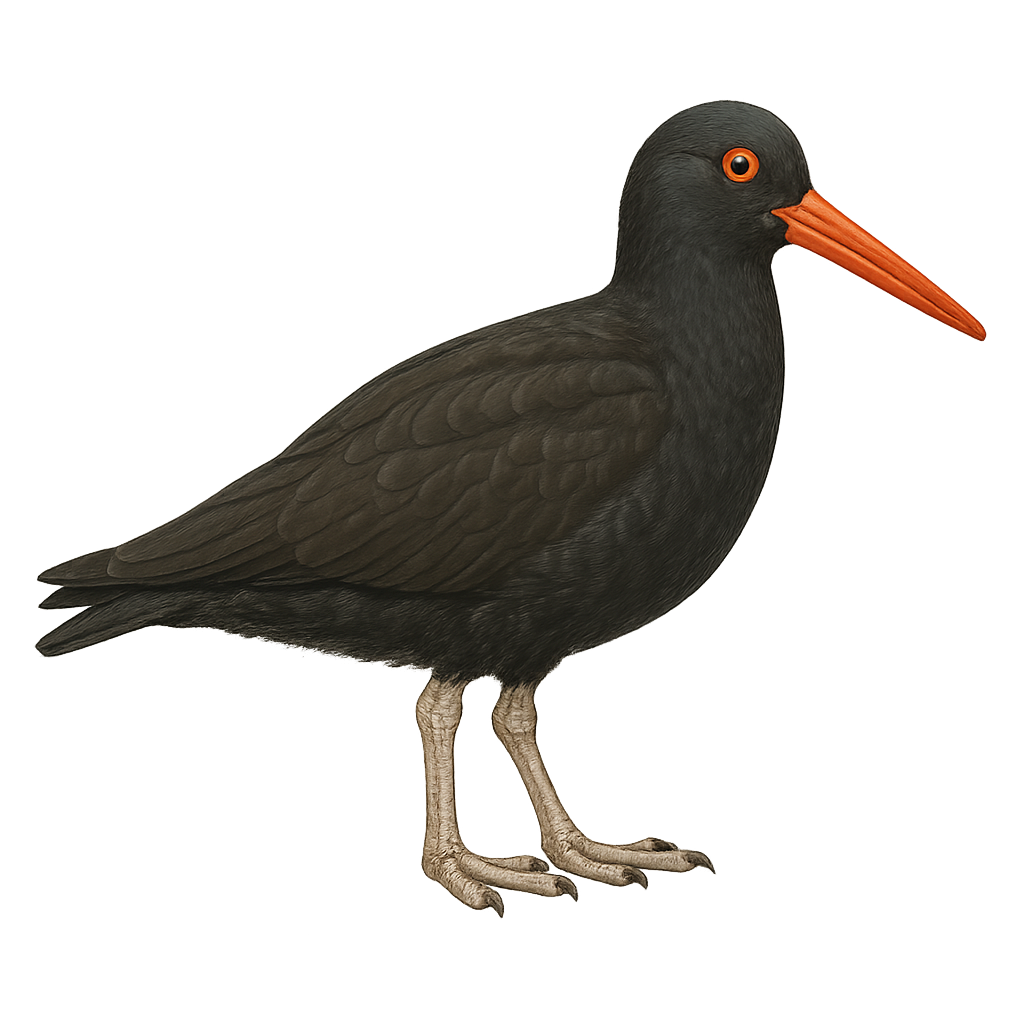
Black Oystercatcher
Scientific name: Haematopus bachmani
IUCN Status: Least Concern
Family: HAEMATOPODIDAE
Group: Birds
Sensitivity to human approach: Suspicious
Minimum approach distance: 10 m
Courtship display: May to July
Incubation: 26-28 jours
Hatchings: June to August
Habitat:
Rocky coasts, pebble beaches, estuaries
Activity period :
Primarily active during the day, with peak activity in the morning and late afternoon.
Identification and description:
The Black Oystercatcher is a distinctive coastal bird, recognizable by its black plumage and long red-orange bill. It primarily inhabits the rocky coasts of the North Pacific, from Alaska to California. This bird is often seen foraging for mollusks and crustaceans, which it skillfully opens with its powerful bill. Although its appearance is understated, its loud and piercing call is easily identifiable. The Black Oystercatcher is monogamous and vigorously defends its territory during the breeding season. Pairs often nest on rocky islets, where they typically lay two to three eggs. Despite its wide distribution, it is sensitive to human disturbances and environmental changes, making it a species to watch.
Recommended lens:
400 mm – adjust based on distance, desired framing (portrait or habitat), and approach conditions.
Photography tips:
To photograph the Black Oystercatcher, it is advisable to use a telephoto lens of at least 400mm to capture detailed images without disturbing the bird. Choose a time of day when the light is soft, such as early morning or late afternoon, to achieve natural colors and avoid harsh shadows. Be patient and discreet, maintaining a distance of at least 10 meters to avoid scaring the bird. A tripod can be helpful to stabilize your camera, especially if using slower shutter speeds.
From knowledge to field practice
A species profile helps you understand an animal. In the field, the challenge is often different. Remembering your own observations.
The WildlifePhotographer app allows you to:
• record your personal observations
• note locations, dates, and behaviors
• revisit your field references over time
• build a private and long-term field logbook
The app does not provide observation locations.
It helps you organize what you actually observe, with respect for wildlife.